Thursday, October 8, 2009
Hazy Hills
I took it on August 31 from my son's deck in Vernon. The haze is from a forest fire that was burning in the Kamloops area and the wind had drifted it all through the Okanagan.
I converted it to black and white and then used the duotone feature in Photoshop. This is actually a quadtone.
What I like about it? The simple lines and the overall look with the hills just visible through the haze. The one thing I don't think I like? The gap between the trees and the bushes. My eye goes to that gap.
I shot it using my 70-200 Canon lens at 200mm and 1/500 @ f7.1, ISO 125. Taken about 2:00 in the afternoon.
*It does make a nice new header picture, though.*
Friday, September 18, 2009
October Wallpaper
I never made a September wallpaper and it seems a little bit late to do so but here is one for October that I took recently from the deck at my son's place in Vernon. I thought the clouds were pretty cool. A 1000x667 size can be found in this album.
Here's a funny mistake I made while working on this picture. I cropped it to 1000x667 and Photoshop took forever to do it. I was annoyed at the program or the computer, whatever was causing the lengthy delay. I left the computer and let it do it's thing and came back a while later and it was finished. But, it was huge and I'm going "d'oh, what did I do?" I checked the settings and had forgot to change it to pixels from inches so it create this multi-gigabyte file that was 1000 inches by 667 inches. No wonder it took so long. I fixed it up and it cropped in it's usual fast time and I was just laughing at myself. It wasn't the computer, or the program but the operator. Oh well, live and learn.
Wednesday, August 12, 2009
RAW and B&W Shooting
One thing that most experts agree on is that you should shoot in color and convert to black and white in Photoshop or whatever image manipulation program one uses. That way, all the data is there and this allows for greater flexibility when converting to black and white.
What had me a bit perplexed (just a bit) is how that relates to shooting in RAW. Most cameras have the option to shoot in black and white but, in my mind, if you shoot in RAW that shouldn't make any difference except that the picture you see on you camera screen would be black and white. I'm thinking that this could be a good thing because it would give you an idea of what the image would look like in black and white. But, since RAW captures everything it seemed to me that when you brought it into your software, it would be in color and you would still need to convert although I have never read this anywhere.
So, I went out this evening and gave it a try. I put the camera in black and white mode (still in RAW) and took a bunch of shots of whatever was between here and the video store we walked to in order to return a movie. The screen of the camera showed the pictures in black and white. When I got home I imported the movies into Adobe Bridge and when they came up, as I thought, they were in color.
Just a note here for those who shoot in JPEG, this won't work since the camera converts the RAW file in its own software according to what mode you tell it to, ie. black and white.
This presents an interesting option when I am planning to shoot specifically for black and white conversion because now the viewfinder can give me a general idea of what the final conversion might look like.
Above are two of the shots I took on my little walk and converted to black and white. After conversion, I then use the quadtone option in Photoshop to give a richer look to the image. Sometimes it helps, sometimes not. I also convert using the black and white adjustment layer. The pictures are within 2 1/2 blocks of where I live. On the surface, a boring area but with, I think, some interest to be found. All in all, it was a good exercise and, though I didn't care about what I captured, I ended up with these two shots that I kind of like.
Saturday, August 1, 2009
August Wallpaper
Of course, my wife and I also traveled to Ontario for the wedding and included a visit with my brother and his family in Oshawa before moving on to Peterborough for the wedding festivities.
I grabbed this picture just after we got off the commuter train in Oshawa. 12 of us had travelled to Toronto for a Blue Jays game as part of a stag party for my son. I thought it would make a good August wallpaper.
1/1000 at f5.6, ISO 100, 72 mm focal length, processed in Topaz Adjust for the HDR look.
Monday, June 29, 2009
Just some Fun
I'm too tired to look up the camera specs, plus the computer is reacting to the big file this became in photoshop and is running a bit slow.
Hope you enjoy my "artful" endeavor.
Thursday, June 25, 2009
Black and White
I converted to black and white in Photoshop using the black and white adjustment, then switched it to grayscale and used a quadtone present to get some richness to the image.
Specs: Canon 30D, 17-85 lens @ 38 mm (which is about a 61mm equivalent with the 1.6 crop factor), 1/60 @ f5, ISO 100.
Lighting info: I set up in a room upstairs in my daughter's house. Camera right had a window with light coming in so I used my 5 in 1 reflector using just the diffuser to let some softer light shine through. Behind the camera was another window that had light streaming in. I draped a white bedsheet over my daughters bowflex to soften that light. Then I used a Lastolite Ezybox Hotshoe softbox with my Vivitar flash shooting through it.
Wednesday, June 24, 2009
Who is a Real Photographer?
There is a great post by David duChemin on the definition of a photographer and some great comments following. It's a good read and raises an interesting subject.
Here's some further thoughts on it. As I mentioned above, I installed some flooring recently. It maybe doesn't make me a flooring expert but certainly a DIYer.
When I worked in the warehouse at the mill I told my kids I was a professional driver. Technically, I was because I got paid to drive around the warehouse getting paper rolls for loading. Certainly not on the level of a Formula One driver, but what defines professional versus amateur? Mainly, in my opinion, getting paid for it. The term doesn't define the skill or skill level. An amateur golfer/football player/photographer/floorer may well have the same skill levels or higher that the pros do, but don't get paid for it.
I consider myself an amateur photographer, a hobbyist, whatever. I have been trying to take it to a higher level by learning about lighting, etc. and buying additional equipment. But, I'm not really interested, at this point, in making it all a business with all the pressure, etc.
Just some additional thoughts.
Tuesday, June 23, 2009
Seth Triptych
I was thinking last night that I could have fancied up the text and done it in color, etc. but I like the basic black text. Suits the black background, I think.
Photoshop makes it all quite easy for this simple one.
It's a great hobby!
Wednesday, June 17, 2009
Pocket Wizards and a Self-Portrait
All they do for me at the moment is get rid of the cord which isn't that big a deal when shooting in close proximity to the subject or when the camera is on a tripod. But it will be nice to be shed of the cord.
Even though I don't have a TTL flash, which means I can't take full advantage of these puppies, the small size and the ability to mount the transmitter and receiver directly to the camera or flash is a great plus and is probably what sold me.
I set up my Lastolite Ezybox Hotshoe softbox today to take some shots of the only model I could find available, me. I did have some trouble getting the TT5 set up because the shoe is offset a bit and it was just a bit difficult to get everything to work. I'll have to make some kind of mods to the Ezybox system to facilitate this but I still managed to get it working okay.
So, here is one of the shots I took. I bought this straw fedora for $10 a couple of weeks ago solely because I wanted to take some pics of me wearing it. I really wanted some sunglasses to wear as well but couldn't find any cheap ones that I liked. (I normally wear glasses so don't have any sunglasses.
It took me awhile to get the lighting the way I liked and most of the shots were opposite to this one. I changed up just for a few with the flash on camera left. One Vivitar flash through a Stofen Omnibounce and then through the Ezybox on Camera left. On Camera right I had a 30" reflector propped up on a highchair to bounce some light onto the left side of my face.
The background was a wrinkled white sheet and I had another Vivitar flash attached to a slave firing behind it. This blew out most of the wrinkles and the couple remaining were dealt with in Photoshop. A bit of adjustment was done in Camera Raw and a bit of softening of my old skin in Photoshop and I cropped it to a square format.
The PocketWizards worked flawlessly. I thought I had a problem towards the end of my shoot when the odd time the flash wouldn't fire but then I discovered that the batteries were pretty much done in the flash.
Other Specs: Canon 30D, 70-200 lens @ 70mm, 1/250 @ f6.3, ISO 100, Manual mode.
Monday, June 15, 2009
Family Photo Shoot
This one is just a fun one taken when Bryce took the soother out of Seth's mouth and put it in his mouth. I thought it would be fun to apply some Topaz Adjust filter work to it and this is what came out.
I like it.
The photos were all taken using one light off camera through my new Lastolite Ezybox softbox using a Vivitar flash.
Sunday, June 14, 2009
Grandson Seth Quadtone
Since I've been playing with duotones and tritones and quadtones, I applied a quadtone preset in Photoshop to this shot.
It all comes down to personal preference. I like this one.
Specs: Canon 30D, 70-200 lens @ 89mm, 1/30 @ f6.3.
Saturday, June 13, 2009
Further on Pictures I Like Most
I took this picture the summer of 2007, when my digital SLR was just a bit over a month new to me. Here is the anonymous person, a young girl playing in the sand at Lightning Lake in Manning Park, B.C.
This picture combines two aspects of what I have mostly shot, people and nature. I love this shot. It shows the fun and enjoyment of a day at the lake. She's doing something. The hat is great. I just like it, a lot.
As to the experimental nature of photography. I had not done anything with this until I started playing around with the Topaz Adjust filter and started looking back to find pictures that suited this look. It is one option available to make the picture pop.
This treatment, on the other hand, I did just a couple of days ago and is the result of starting to play around with duotones and tritones and split-tones. This one is actually a split tone done in Adobe Camera Raw with some vignetting also done in ACR. What appeals to me here is the old-fashioned look to the picture, something that could be out of my childhood in the late 50's.
It's all in what you like and what appeals to you at a certain point in time. The great part is all the options one has today without having to spend hours in a darkroom with all the chemicals. Something, by the way, I always wanted to do but never had the opportunity. It's why I now love this digital darkroom stuff so much. Experimentation. It's fun.
Friday, June 12, 2009
Another Shot I Kind of Like
But still, it is a candid shot. She is talking to an older gentleman who I would have possibly included in the crop but for an ugly yellow power pole guide wire that slices across part of him.
The shot does illustrate what I am starting to realize that I like a lot. Candid, informal. Her smile tells me she is enjoying her conversation and is relaxed and happy at that moment. Kind of neat, I think.
Obviously, I've got some work to do in getting where I seem to want to go, but it's a start.
I used my split tone preset in Camera Raw and then added a bit of noise in Photoshop.
Thursday, June 11, 2009
Why I Like It!
When I look at some of the other pictures I like most, they all have people in it, mostly people that are not aware that a picture is being taken. It is kind of like candid street photography which is a legitimate form in itself and is most often seen in journalistic endeavors. While I am still new enough at it that I'm a bit embarrassed if I am noticed, I think the time will come when I can stop and talk with the person and explain what I am trying to do. But the best is getting a shot without being noticed because you catch all the candor of what is happening.
Now, if it descends to the level of paparazzi, or begins to invade privacy then that becomes a different matter, but I'm getting away from the main topic.
The shot above appeals to me on several levels and I was pretty lucky to get it and like it because I only took one shot. The engagement with the unknown person in the car that she is talking too, the interesting poles strapped to her back. I happen to know that they are oars because I paid attention as she walked by. The line of mirrors that lead you into the picture is appealing. Even the out of focus look makes the picture work for me better than if it had been crystal clear. Where is she headed? What is she doing? What is she talking about? All interesting to me. I'm not sure why. I just enjoy the candidness of the scene.
Picture preparation makes a picture, too. The colors were pretty muted in this. Lighting wasn't great since it was bright, almost noontime sun, so it seemed perfect for black and white with some split toning look to it.
Well, I really haven't answered the question. Obviously, I don't really know what appeals to me other than that it is unposed and unexpected. Over the next few days I'll try and post some other pictures that have a similar appeal to me. Some, I may have posted here before, but nobody visits this blog anyway so this is mostly for my own benefit and my own search for vision.
Wednesday, June 10, 2009
Finding One's Vision
I know, it all sounds kind of hokey to those who just want snapshots, and I take a lot of them, too, especially of my grandkids. I've got a bit of lighting gear, although not as much experience with it as I should considering the money I've spent. I've got one great lens that I use a lot and I'm thinking of purchasing at least one more great lens, certainly before upgrading the camera, or buying any more lighting gear.
But, to get back to the point I'm trying to get at, as I look and think about my favorite shots, there are some landscapes that I like, but I think I enjoy the candid, unexpected people shots the best. Consider this shot that I took last Friday and posted a version of the other day.
I really like this shot. I was sitting in my truck in the ferry terminal, waiting to go to Powell River and finally pulled the camera out to take some shots that had caught my eye. I saw this scene in my passenger side rear-view mirror and tried to take a shot. The camera focused on the mirror, not the image in the mirror and the shot ended up blurred like this. But, I really like it. I wasn't really happy with the cropping in the picture I posted the other day, so I recropped and like this one better. The only other work on it was using the split-toning panel in Adobe Camera Raw to get this look.
Now, the real question is why do I like it so much. Tomorrow, I'll try and find the time to answer that question (if I can figure out what the answer actually is.)
Tuesday, June 9, 2009
Colors in Coombs II
Again, it's the colors that appeal to me and make the shot.
Specs: Canon 30D, 70-200 lens @ 70mm, 1/13 @ f4, ISO 400.
Monday, June 8, 2009
Colors in Coombs
Right next door is the Coombs Emporium with several more stores. As I wandered around the area, there was a store selling these outfits for women and these were on display. The models aren't stunning, but the colors are and that's what attracted me to this shot. Tomorrow, I'll have another shot of some colorful stuff inside the Old Country Market.
Specs: Canon 30D, 70-200 lens @ 150mm, 1/50 @ f8, ISO 100.
Sunday, June 7, 2009
Picture Choices
I had to take a trip to Powell River the other day that involved a whole lot of waiting in ferry terminals. I did bring the camera and pulled it out while sitting in my truck on the Vancouver Island side of the trip. It often surprises me when I look at pictures at what works for me and what doesn't. Sometimes, a quick grab shot becomes something I like. That's one thing I enjoy a lot about photography.
As I said, I was sitting in my truck and I noticed this women in my passenger side rear view mirror and I took a shot. I couldn't get the focus right (duh, never thought until after to adjust it manually) but I think it turned out better with the blur. I do wish I had gotten a little bit more of her because the poles that are strapped together are oars and that would add another element to the picture.
Though I played with this a bit in Adjust I found nothing I liked so I went back to Camera Raw and started playing with the split tone panel. I converted it to grayscale and then just adjusted sliders until I got something I liked. I also added a vignette in the camera adjustment panel and cropped to bring the focus on the woman a bit better.
Specs: Canon 30D, 70-200 lens @ 200mm, 1/500 @ f4, ISO 100, reflection in truck mirror.
Monday, June 1, 2009
Baby Flowers
Specs: Canon 30D, 17-85 lens @ 85 mm, 1/20 @ f5.6, ISO 200.
Sunday, May 31, 2009
What's Been Occupying My Time
His name is Seth and he was almost 8 lbs. when he was born. I love the little fist he is making and I like to think he is getting ready for his three older cousins.
Specs: Canon 30D, 17-85 lens @ 47 mm, 1/15 sec @ f6.3, ISO 200.
Wednesday, May 27, 2009
New Grandchild
But, I'm trying to keep some continuity so here is Seth, today's picture.
Specs: Born @ 8:08 a.m. on May 26, 2009, 7 lbs., 14 oz. @ 21.25 in. length, status: doing well.
Tuesday, May 26, 2009
Kamloops Lake
Specs: Canon 30D, 17-85 lens @ 70mm, 1/250 @ f11, ISO 500. (Hmm, I definitely need to learn to reset to ISO 100 or check it before I shoot. I could have easily shot at ISO 200 with a shutter speed of about 1/100 and been good.)
Monday, May 25, 2009
Montreal Revisited
I took the PSD file I had from my original work on it and applied the Denoise filter from Topaz before playing with the Adjust filter. I liked a black and white preset that I have and so I applied it. I had used a gaussian glow preset in the original treatment with some masking and when I put it back in play (at 39% blend level) it brought back just a touch of the original blue while maintaining the moodiness from the black and white treatment.
I guess this kind of underscores the importance of saving files in PSD with all the layers still there because it leaves it open for further adjustments in the future. Hard drive space is cheap these days.
Specs: Canon 30D, 17-85 lens @ 53mm, 1/25 @ f5.6, ISO 400.
Sunday, May 24, 2009
Purple and White
The only adjustments were minor ones to pump the contrast a bit and I did clone out some web-like stuff that I found distracting.
Specs: Canon 30D, 70-200 lens @ 200mm, 1/50 @ f4, ISO 200, taken May 21, 2009.
Saturday, May 23, 2009
Sunflower Visited
I revisited it a couple of days ago and the only real change was that I used Topaz Denoise for a little cleanup and Topaz Adjust to give it a color pop.
Specs: Canon 30D, 17-85 lens @ 76mm, 1/320 @ f11, ISO 800.
Friday, May 22, 2009
Ferry Chains
Specs: Canon 30D, 17-85 lens @ 85mm, 1/13 @ f5.6, ISO 100.
Thursday, May 21, 2009
View From a Rest Stop
Specs: Canon 30D, 70-200 lens @ 70mm, 1/250 @ f4, ISO 100, Conversion to black and white using Topaz Adjust.
I've never really listed what camera mode I shoot in but pretty much everything taken without flash is shot in Aperture priority. Any portraits taken using a flash is usually shot in manual.
Wednesday, May 20, 2009
Happy Birthday Rena!
Though Rena loves all of her grandchildren equally, there is a bit of a special bond with this one. Lucas was born prematurely last June, ended up briefly in Children's Hospital in Vancouver before eventually going home. Shortly after, Rena went to Vernon and spent a month helping Jen and Neil out with this one and his two older brothers. Naturally, she held this one quite a bit and bonded with him. So, everytime we see him, Rena wants a picture of him and her for her facebook profile. This is the most recent from May 6, 2009.
But, the main point is that today is Rena's birthday and I want to wish her a happy one. It has been a great joy growing older with her and I hope to celebrate many, many more with her.
Tuesday, May 19, 2009
Tall Ship HDR
Anyway, this picture was taken on June 30, 2008 in Victoria, B.C. There were some tall ships that had been in and were departing. This one was still sitting here so I took three shots at three different exposures which can be great for HDR photos. I merged them to HDR in Photoshop, did the minor Photoshop thing by converting to 16 bit exposure, but then used Topaz adjust to really get what I was after. This is the result. The photo composure could be better because the ship sits smack in the middle of the frame, but cropping away the left would mean losing the mast and I'd rather have that.
Specs: Canon 30D, 70-200 lens @ 89mm, f11 and three exposures with the base exposure at 1/200, and then 1 1/3 stops faster at 1/80 and 1 1/3 stops slower at 1/500. I know, it sounds backwards but I think I have it right. You get faster by opening up the aperture (ie. f11 to f8) or leaving the shutter open longer which means a slower shutter speed allowing more light in thus making it a faster exposure. I'm not sure if this is right terminology for shutter speeds but I know it is for aperture. A f1.4 lens is faster than a f4 lens. Any questions?
Monday, May 18, 2009
Beautiful Amanda
Sunday, May 17, 2009
Another Shot of Lucas
Saturday, May 16, 2009
Clouds and Split Toning
I also played with it in Topaz Adjust and found some funky looks but ended up not using any of them. I did apply a Levels adjustment layer, but that was it.
There is something awesome and peaceful about this to me, so I like it and the colors. If you pay attention to f stops and shutter speeds you'll see that it is bright shooting into the sun.
Specs: Canon 30D, 70-200 lens @ 135mm, 1/3200 sec @ f11, ISO 100.
Friday, May 15, 2009
Grandson Nathan - The Baseball Player
Thursday, May 14, 2009
Grandson Ben
I used the high pass filter in Photoshop, using a technique I read about in the May/June 2009 issue of Digital PhotoPro magazine.
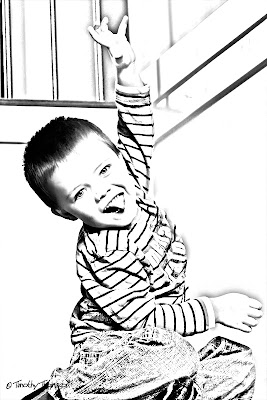
Specs: Canon 30D, 70-200 lens @ 70 mm, 1/250 sec @ f6.3, ISO 200.
Wednesday, May 13, 2009
Grandson Lucas
I also shot some other things including the baby of the family (at least until my daughter has her baby), Lucas.
This was shot in late afternoon light, with no flash of any kind. I did some adjustments in ACR and then used Topaz Denoise but not Adjust. I ran a couple of actions I have to increase contrast a bit and smooth the skin a bit. And I cloned out someone else's body part in the upper left hand corner.
Specs: Canon 30D, 70-200 lens @ 176 mm, 1/640 sec @ f4, ISO 200.
Tuesday, May 12, 2009
Fall Fair 2008, Part 3
I have read some criticisms of this type of look saying it isn't realistic. While that may be true, it is also true that the human eye is amazing in terms of its ability to adjust for just about any lighting situation. The camera, as great as it is, is nowhere near the level of the eye. And so we use tools to try and get back to that level.
In this picture I was trying to get Mount Arrowsmith in the background through the foreground of the fair midway. I had made little effort at this particular shot but when I through the Adjust filter at it, it improved a bit. Not a huge keeper but the colors make it worth posting.
Specs: Canon 30D, 70-200 lens @ 111mm, 1/400 @ f8, ISO 200.
Monday, May 11, 2009
Fall Fair 2008, Part 2
Sunday, May 10, 2009
Fall Fair 2008
I took my camera along this time and grabbed a few shots that I thought were interesting. And Topaz Adjust just makes the colors pop.
Specs: Canon 30D, 70-200 lens @ 70mm, 1/25 @ f 7.1, ISO 100.
Saturday, May 9, 2009
Different Portrait Look
I did this fairly quickly on a picture of my grandson, Ben taken a couple of months ago and I'm sure I could do a lot better job on it with some experimenting, but, since it is already tomorrow in the eastern time zone, I wanted to get something up so my consistency of late is not broken.
Here are Tim Grey's instructions on how to do this from his May 8, 2009 newsletter. I created an action to make it much quicker and there is a lot to play with:
"Start by opening a portrait you'd like to apply the effect to. Then create a copy of the Background layer by dragging the thumbnail for the Background layer on the Layers panel to the Create New Layer button (the blank sheet of paper icon) at the bottom of the panel. With the Background Copy layer active on the Layers panel, choose Image > Adjustments > Invert to invert the colors on this layer. Then change the blend mode for the Background Copy layer to Color Dodge using the popup at the top-left of the Layers panel.
Next, choose Filter > Blur > Gaussian Blur. Adjust the Radius to refine the degree of detail in the sketch version of the image, then click OK. Add a Black & White adjustment layer without applying any changes, just to remove the color from the resulting image. Then add a Levels adjustment layer. Bring the black point (directly under the histogram on the left side) inward to darken up the lines in the sketch, and fine-tune overall as needed."
Friday, May 8, 2009
Garden Shovel
Thursday, May 7, 2009
Bird Bath
The one other major adjustment I did was in ACR (Adobe Camera Raw) with a great new feature in CS4 called the adjustment brush. In the original, the bowl part was quite dark. With the adjustment brush I was able to increase the exposure level and bring out the color in the bowl under the rim. Now, if I had made the effort I could have used a reflector, or a little bit of flash to do the same thing, but I was just grabbing a couple shots of the garden for facebook so it is nice to be able to make an adjusment in Photoshop.
Specs: Canon 30D, 17-85 lens @ 61 mm, 1/125 sec @ f8, ISO 100, Topaz adjust (on the birdbath and a mild contrast pop on the entire photo).
Wednesday, May 6, 2009
Daffodils Again
I definitely need to make the time to get out and do some shooting. Between work and painting at home and just plain laziness I haven't ventured further than the back yard so there will be a couple more shots from the garden over the next couple of days.
I'm off on a quick trip to Vernon to deliver some furniture so maybe I'll have a chance to shoot something a little different.
Or not.
Specs: Canon 30D, 17-85 lens @ 85mm, 1/400 sec @ f5.6, ISO 100
Tuesday, May 5, 2009
Cruise Ship
Sometimes I take my camera up to the passenger decks with me and sometimes I don't. (I should always because you never know.) This was one time I didn't take it up. But we came back down to the car a few minutes early and I noticed a cruise ship off in the distance so I pulled the camera out and took a few shots. And then the shot basically just sat there until I started posting regularly to a blog no one really looks at, but is nonetheless a good exercise for me. I played with this shot a bit in Adobe Camera Raw, mainly giving it a warmer look and I like the golden sky, the monochrome mountain in the backgroun and the bright reflection of the sun on the side of the cruise ship. I'm glad I rediscovered it.
Specs: Canon 30 D, 70-200 lens @ 200mm, 1/400 @ f11, ISO 100. Topaz Denoise.
Monday, May 4, 2009
Marigolds
Specs: Canon 30D, 70-200 lens @ 200mm, 1/80 sec @ f4, ISO 100, Topaz Adjust for a mild contrast boost.
Sunday, May 3, 2009
Two Tulip Views
Especially when you rotate the picture 90 degrees clockwise! It takes on some alien look in my mind.
Specs: Canon 30D, 70-200 lens @ 200 mm, 1/125 sec @ f4, ISO 100. Contrast pop in Topaz Adjust.
Saturday, May 2, 2009
Victoria Street Scene
One nice thing as I go through pictures is to discover ones that I had forgotten I even took. I can be a rapid fire shooter, just wandering around and taking pictures of anything that looks interesting, not spending a whole lot of time. I believe this is the only shot I took of this group of young people on the streets of Victoria, B.C. making music. I think I shot from across the road, and, the color snaps out with the use of the Topaz Adjust filter. Taken just up the road from the Victoria Harbour shot posted yesterday. Also from June 30, 2008.
Specs: Canon 30D, 70-200 lens @ 135mm, 1/50 sec @ f4, ISO 100.
Friday, May 1, 2009
A Different Ferry
This is a little ferry in the Victoria harbour that takes you around from place to place, kind of like a little water taxi. I thought it made a nice shot.
Specs: Canon 30D, 70-200 lens @ 70 mm, 1/320 sec @ f4, ISO 100.