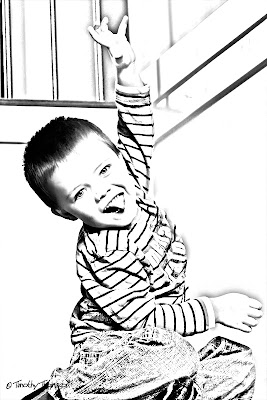
 I realized today at work that I had no post scheduled for today so here is something I was playing with a bit last night. I got this idea and suggestion from a Tim Grey's Daily Digital Question newsletter (sign up here) and it supposed to simulate a look used in the Wall Street Journal by Kevin Sprouls. Now, if you look at the link you will see that this really doesn't look much like the work done by Sprouls, but it is still a pretty cool effect I think.
I did this fairly quickly on a picture of my grandson, Ben taken a couple of months ago and I'm sure I could do a lot better job on it with some experimenting, but, since it is already tomorrow in the eastern time zone, I wanted to get something up so my consistency of late is not broken.
Here are Tim Grey's instructions on how to do this from his May 8, 2009 newsletter. I created an action to make it much quicker and there is a lot to play with:
"Start by opening a portrait you'd like to apply the effect to. Then create a copy of the Background layer by dragging the thumbnail for the Background layer on the Layers panel to the Create New Layer button (the blank sheet of paper icon) at the bottom of the panel. With the Background Copy layer active on the Layers panel, choose Image > Adjustments > Invert to invert the colors on this layer. Then change the blend mode for the Background Copy layer to Color Dodge using the popup at the top-left of the Layers panel.
Next, choose Filter > Blur > Gaussian Blur. Adjust the Radius to refine the degree of detail in the sketch version of the image, then click OK. Add a Black & White adjustment layer without applying any changes, just to remove the color from the resulting image. Then add a Levels adjustment layer. Bring the black point (directly under the histogram on the left side) inward to darken up the lines in the sketch, and fine-tune overall as needed."

No comments:
Post a Comment